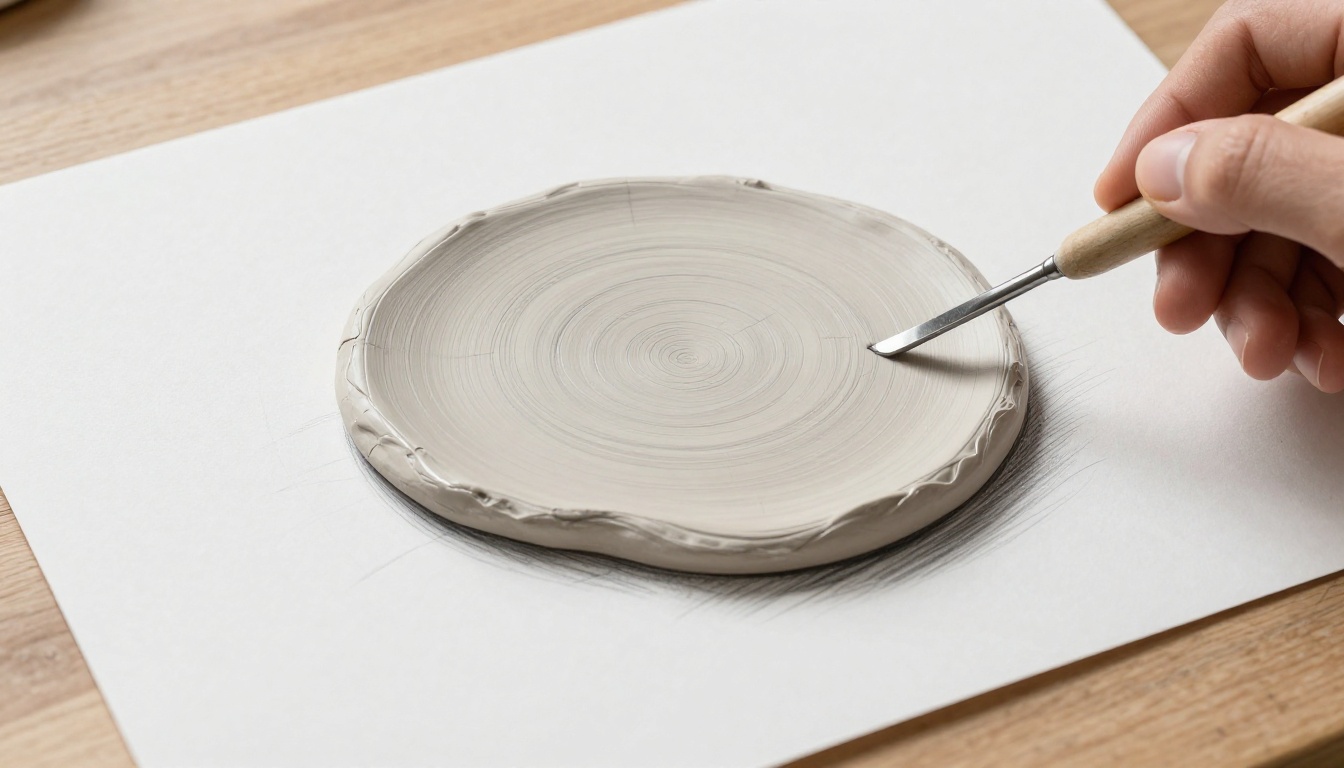
Imagine a clay plate under soft light. You scratch its surface. Suddenly, intricate patterns emerge in sharp contrast. That’s the thrill of sgraffito.
This technique scratches through colored slip on clay. It reveals the base color underneath. Beginners love it on leather-hard clay. The clay stays firm enough for clean cuts. Yet it remains damp to prevent cracks. You get precise lines without frustration.
Sgraffito suits new potters perfectly. No advanced skills required. Just patience and basic tools. This guide covers the basics first. Then you’ll see tools needed. Next comes a step-by-step process. We add tips and finishing advice too. Anyone can make pro-looking pieces at home. Let’s get started.
Grasping the Basics: What Sgraffito Means and Why Leather-Hard Clay Rocks for It
Sgraffito comes from ancient Italian pottery. Potters layer slip or underglaze on clay. They scratch designs to show the clay body below. Think faces, leaves, or geometric shapes. The result pops with bold contrast.
Leather-hard clay hits the sweet spot. After forming, you let it stiffen. It feels like firm leather. A fingernail dents it slightly. But it holds shape well. This stage lets you carve cleanly. Crumbs don’t fly everywhere.
Bone-dry clay crumbles too easily. Wet clay smears and sticks. Leather-hard avoids both issues. You draw sharp lines. Creativity flows without special kilns upfront. During the Renaissance, potters used it for detailed wares. Today, it empowers home artists.
For more on clay stages, check Digitalfire’s leather hard explanation.

How Sgraffito Creates That Eye-Catching Contrast
Contrast makes sgraffito shine. Pick slip opposite your clay. Black slip over white clay works great. Or red on buff. The base clay shows through scratches.
You build layers simply. Base clay first. Then a slip coat. Carve reveals the surprise below. Florals or geometrics stand out. No painting needed. Just steady hands.
It’s like scratching a lottery ticket. Colors emerge fast. Or etching glass for clean lines. Beginners master it quickly.
Spotting and Maintaining Perfect Leather-Hard Clay
Leather-hard clay feels cool. Its surface scratches easily. But it won’t sag or deform. Texture mimics leather.
Cover formed clay with plastic. Wait one to two days. Check daily by touch. Wrap extras in damp towels inside plastic bags. Store in cool spots.
Rush it, and wet clay smears. Let it dry too long, and chips form. Patience pays off. Sensory cues guide you.
Your Must-Have Toolkit: Simple Supplies for Beginner Sgraffito
Start small. No fancy gear required. Stoneware clay slabs or simple bowls form your base. It handles carving best.
Grab contrasting slip or underglaze. Black or white fits most. Carving tools include metal ribs, needle tools, loop tools, and craft knives. They cut clean lines.
You’ll need a sponge for cleanup. A paintbrush applies slip evenly. Keep a reference photo or stencil handy. Optional items: a banding wheel spins your piece. Detail brushes add finesse.
Shop local art stores. Or find basics on Amazon pottery tool sets. Test on one-pound scraps first. Budget stays low.
Hands-On Fun: Follow This Easy Step-by-Step to Carve Your First Sgraffito Piece
Form your clay first. Roll a slab or throw a basic bowl. Keep thickness even, about half an inch.
Wait for leather-hard stage. This takes one to two days.
Mix slip to yogurt consistency. Brush on two to three thin coats. Tilt to avoid drips.
Let slip firm up. Wait 30 to 60 minutes until tacky.
Prepping and Applying Slip for Smooth Carving
Slip recipe uses clay, colorant, and water. Stir smooth. Apply even layers. Thin coats prevent cracks.
Drying matters most. Mist with water if it dries too fast. Tacky surface carves best.
For a basic slip recipe, see Ceramic Arts Network’s guide.
Carving Your Design: Techniques for Clean, Crisp Lines
Sketch lightly with pencil. Simple motifs work for starters.
Hold tools at 45 degrees. Light pressure outlines shapes. Deeper cuts add shadows.
Practice straight lines, curves, and dots. Stencils help complex designs. Clean tools often. Slip buildup blurs edges.
Watch clay color emerge. It’s like magic.

Cleaning Up and Refining Your Masterpiece
Sponge off loose bits gently. Skip water on fresh carves. It softens edges.
Smooth with ribs. Add texture where needed. Check under light. Fix missed spots now.
Level Up Your Results: Best Tips, Common Mistakes, and Fixes
Practice on test tiles first. Good lighting shows details. Vary tool angles for depth.
Experiment with colors. Underglaze lasts better than slip sometimes. Speed helps organic lines.
Wear a mask. Dust irritates lungs.
Carve too soon? Slip smears. Fix by waiting longer. Thick slip cracks. Use thinner layers.
Fuzzy lines mean dull tools. Sharpen them. Patience turns errors into lessons.
See The Pottery Wheel’s sgraffito tips for more ideas.
Quick Wins to Make Your Sgraffito Pop
Combine with impressions. Press leaves before slip.
Underglaze gives vivid results. Carve fast for natural feel.
Try coasters as first projects. They finish quick.
Troubleshooting: Fixing Slip-Ups Before They Ruin Your Piece
Cracks appear? Dry slower under plastic.
Color bleeds? Apply thicker slip base.
Fuzzy edges? Switch to sharper tools.
Mistakes build skills.

From Raw Carving to Finished Art: Drying, Firing, and Optional Glaze
Dry slowly. Cover loosely for a week. Prevents warping.
Bisque fire to cone 04-06. Use a local studio kiln.
Glaze optional. Clear coats preserve designs. Or try matte. Fire final to cone 5-6.
Ventilate well. Fumes need air.
Hang plates as art. Or use bowls as planters. You create durable pieces.
Ready to Scratch Your Story into Clay?
Sgraffito on leather-hard clay opens creativity fast. You need basics, tools, and steps. Tips fix hiccups. Firing seals the deal.
Grab supplies now. Carve a test coaster today. Share your photos online. What design calls to you first?
Your unique pieces wait. Keep practicing. Next, try mishima or impressed textures. Happy carving.