Picture Sarah, a beginner potter, beaming over her first bisque-fired bowl. She dips it into glaze, but pulls it out covered in drips and runs. Colors pool unevenly, leaving bare spots that ruin the whole piece. Then, she learns the right way, and her next bowl sports a smooth even coat with vibrant shine.
You’ve likely faced that frustration too. An even coat delivers pro-level results: colors pop vividly, the surface gleams without flaws, and your work stands out at shows or sales. No more wasted clay or heartbreaking redo’s because runs mar the finish or thin spots fade fast.
The good news? You can master this with simple steps anyone can follow. We’ll cover prepping your piece for the dip, mixing glaze to the perfect consistency, the exact dipping technique for uniform coverage, and drying tips to avoid sags. Beginners especially love how these tricks build confidence fast.
In addition, you’ll avoid common pitfalls like bubbles or cracks. So, grab your apron. First, let’s check the materials you’ll need to get started right.
Gather These Must-Have Supplies for Smooth Glaze Dipping
You need the right glaze dipping supplies before starting. These items make the process safe and simple. First, pick a bisque-fired ceramic piece. Bisque firing hardens clay at lower heat, around cone 04, so it soaks up glaze evenly. Next, prepare properly mixed glaze. Aim for yogurt-like thickness; too thin causes runs, too thick leaves bare spots. Use tongs or heat-resistant gloves to grip pieces without burns or fingerprints. A bucket or deep container holds enough glaze for full dips. Keep a stirring stick handy to mix constantly and prevent settling. Grab a sponge or rag for wiping drips right away. You’ll also want kiln access that matches your glaze’s firing cone. Safety gear matters too: wear an apron and gloves to shield skin and clothes. For eco-friendly picks, try glazes with natural minerals from suppliers like Amaco or Mayco Colors.
{“sectionTitle”: “Gather These Must-Have Supplies for Smooth Glaze Dipping”, “imageIntent”: “hand-drawn sketch of essential glaze dipping supplies laid out on a workbench including bisque bowl tongs bucket stirring stick sponge gloves apron with light shading on white background”, “prompt”: “hand-drawn sketch style with graphite linework light shading clean white paper background cohesive palette no color fills detailed view of pottery glaze dipping supplies on workbench bisque-fired bowl tongs metal bucket wooden stirring stick sponge rag heat-resistant gloves apron neatly arranged simple composition”}
Stock up now. Proper tools lead to that flawless even coat.
Choosing the Right Glaze for Your Pottery
Pick glazes made for dipping, not brushing. Dipping versions stay fluid longer and coat faster. Brushing glazes dry too quick and streak during immersion. Test viscosity first. Dip a clean test tile into the glaze. Pull it out slowly. A good coat drips once then clings smooth, like honey on a spoon.
Match cone numbers closely. Your bisque fired at cone 04? Choose glaze for cone 05 or 06. Mismatch causes crawling or color shifts. Always go lead-free for food-safe pieces. Lead glazes shine bright but risk health; check labels.
Buy from trusted spots like Sheffield Pottery for ready-mixed options. Or mix your own basics: combine frit, kaolin, and silica with recipes from Digitalfire. Start small. Test fires confirm results.
Setting Up a Safe and Clean Workspace
Organize your station to dodge spills. Place the bucket on a stable tray with lips. Keep tongs and wipes within reach. Good setup saves time and clay.
Ventilation keeps fumes low. Open windows or run a fan; glazes release dust during mixing. Protect surfaces with plastic sheeting or newspapers. They catch drips easily.
Have rinse water ready in a second bucket. Add a splash of vinegar to cut residue fast. Cleanliness prevents defects. Wipe dust from pieces and tools first. Particles cause pinholes or bubbles later. Dry everything well.
Work in a spot away from kids or pets. Now your space supports smooth dips every time.
Prepare Your Ceramic Piece Like a Pro Before Dipping
Prep work sets up success. A clean, smooth bisque piece soaks up glaze just right. Rough spots trap air or cause drips, so fix them now. You’ll get that even coat without extra effort. Let’s walk through the steps.
First, confirm your bisque fire hit the right cone, like 04 or 06. Low fire hardens clay but keeps it absorbent. Too hot, and glaze won’t stick well. Check records from your last firing.
Next, clean off dust. Grab compressed air or a soft camel-hair brush. Never use water; it soaks in and steams out later, cracking your glaze. Brush lightly over every inch.
Then, inspect for flaws. Hold the piece to light. Spot cracks or burrs? Sand them smooth with 220-grit paper. Work in circles for an even finish. This prevents pinholes where glaze pulls away.
Finally, dry completely. Set it on a shelf in a warm, dry room for 24 hours. Bone-dry clay grabs glaze uniformly. As a result, no splotches or bare patches appear after firing.
You’ll preview foot wiping here too. Dip the whole piece first, then wipe excess from the base with a sponge. This avoids glaze sticking to shelves and fusing pots.
{“sectionTitle”: “Prepare Your Ceramic Piece Like a Pro Before Dipping”, “imageIntent”: “potter prepping bisque-fired ceramic bowl by brushing dust sanding rough edge and inspecting for cracks on workbench”, “prompt”: “hand-drawn sketch style with graphite linework light shading clean white paper background potter at workbench prepping bisque-fired bowl soft brush removing dust fine sandpaper smoothing edge close inspection for cracks simple tools nearby focused composition consistent line weight no color fills”}
These steps block unevenness from the start. Smooth prep means glaze flows on predictably.
Testing Glaze Thickness on Scraps First
Test dips save heartbreak. Your main piece deserves perfection, so practice on scraps. This shows exact thickness without waste.
Make test bisque tiles easily. Roll out clay slabs, cut 3×3 inch squares, and fire them with your work. Bisque them to the same cone. Keep a dozen ready.
Dip each for set times. Pull straight up, no tilting. Watch drips and coverage right away. Note what works.
Here’s a quick guide from real tests:
| Dip Time | Expected Result | Best For |
|---|---|---|
| 1 second | Very thin coat | Subtle color, matte finishes |
| 2-3 seconds | Light even layer | Most stoneware glazes |
| 4-5 seconds | Medium build-up | Bright glossy effects |
| 6+ seconds | Thick, prone to runs | Textured or heavy coverage |
Short dips suit watery glazes. Longer ones need thicker mix. In addition, thicker glaze clings better but risks sags.
Adjust water content next. Too thick? Add distilled water one tablespoon at a time. Stir well, then retest. Aim for yogurt consistency; it sheets off smooth. Too thin runs fast, so evaporate water or add bentonite.
Repeat until perfect. Your tests match the real dip every time. Now confidence builds for the main event.
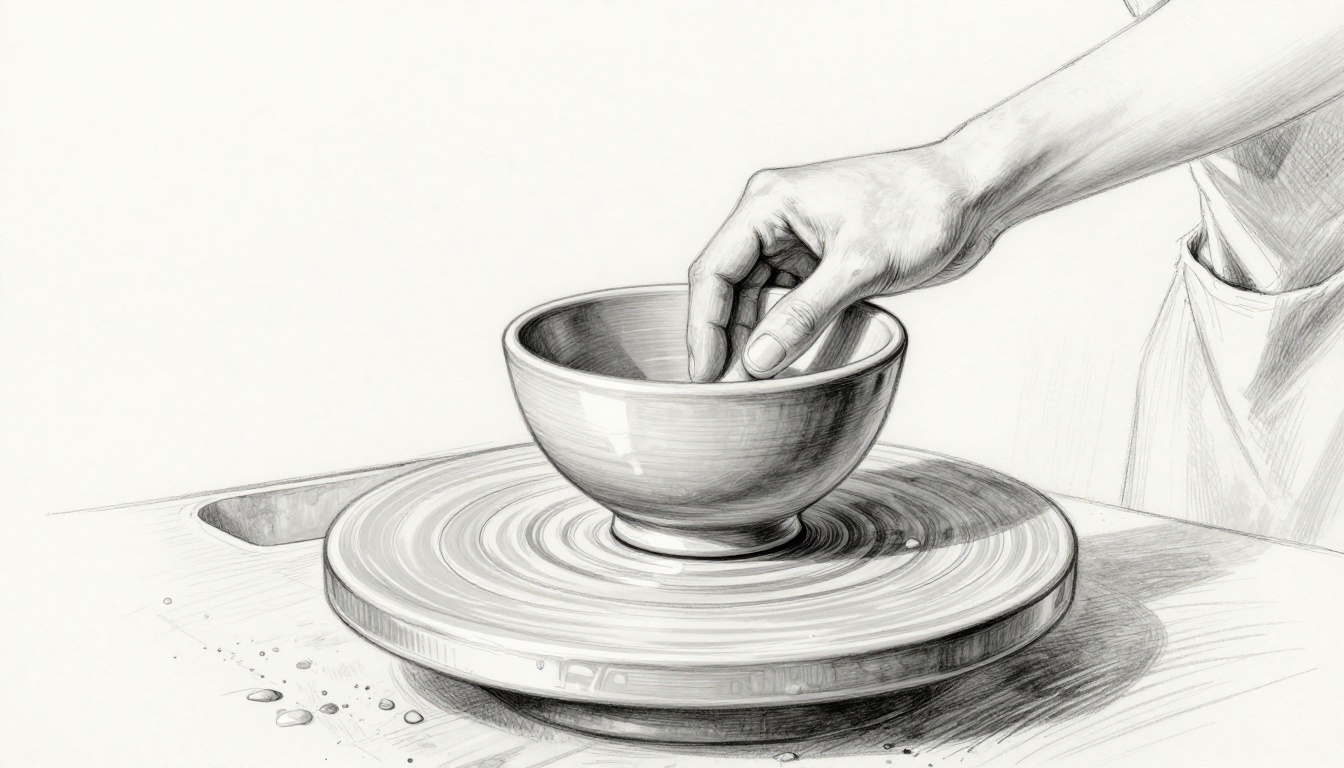
Nail the Dipping Technique for a Perfect Even Coat
Now you reach the key moment. Stir your glaze first with a wooden stick. Do this every few minutes because it settles fast. Wear heat-resistant gloves. They protect your hands from slips. Grip your bisque piece with tongs. Hold it by the foot or a top hole if you drilled one.
Dip bottom-first. Lower it straight into the bucket at a 45-degree angle for small pieces. Submerge fully for 3 to 5 seconds. No more, or it runs. Lift slowly straight up. Avoid tilting; that causes drips. For large pieces, go slower to keep control. Small ones need quick moves.
Rotate gently if the shape demands it. Tap the bottom twice on the bucket rim. Excess glaze falls off clean. Set it on a glaze spike or bat to dry. Speed and steady hands deliver even coverage every time. Practice on scraps first. You’ll see the difference right away.
Safety counts here. Keep the bucket stable on a tray. Work over a drop cloth. If glaze splashes, rinse skin with water fast.
{“sectionTitle”: “Nail the Dipping Technique for a Perfect Even Coat”, “imageIntent”: “potter dipping bisque-fired vase into glaze bucket using tongs steady grip straight lift with tap on rim workbench setup”, “prompt”: “hand-drawn sketch style with graphite linework light shading clean white paper background potter gripping bisque vase with tongs lowering into metal glaze bucket at angle slow straight lift tapping excess on rim focused action stable workbench simple tools nearby consistent line weight no color fills”}
Handling Tricky Shapes Without Misses
Vases challenge you most. Their height leads to drips down the sides. Dip the base first for 2 seconds. Then lift, dry for 10 minutes, and dip the top section. Repeat as needed. This builds even layers without pooling.
Plates stay flat, so submerge quick. Angle them slightly bottom-edge first. Pull up in one smooth motion. One 3-second dip often works. However, watch the rim; it catches extra glaze. Wipe it with a sponge right after.
Sculptures vary wild. Complex curves trap air. Rotate slowly while submerged for 4 seconds. Lift straight. Tap firmly on the tongs to shake bubbles loose. If a spot misses, do a partial dip after full drying. Air bubbles burst in the kiln otherwise, leaving pinholes.
Here’s how to handle each:
- Vases: Sectional dips with dry time between.
- Plates: Quick full submersion, edge-first.
- Sculptures: Rotate in glaze, tap excess hard.
These tips prevent misses. Your pieces come out uniform. Check Lakeside Pottery’s guide on shaped dipping for more visuals.
Controlling Glaze Thickness Every Time
Thin coats give translucent color. They soak in fast but run easy on vertical spots. Thick coats build opacity and shine. Yet they sag and crack during firing. Find the middle for pro results.
Layer if you need buildup. Dip once, dry 30 minutes, then dip again. Limit to two layers max. More causes crawling.
Pros use a glaze gauge. It measures viscosity like a hydrometer. Beginners stick to hacks. Set a stopwatch for dips. Time 3 seconds for thin, 5 for medium. Test on tiles first.
Effects show clear in this chart:
| Coat Thickness | Effect on Finish | Fix If Wrong |
|---|---|---|
| Thin (1-2 sec) | Light, even but pale | Add second layer after dry |
| Medium (3-4 sec) | Vibrant, smooth hold | Ideal for most pieces |
| Thick (5+ sec) | Glossy but prone to runs | Thin glaze with water, stir |
In short, time controls thickness best. Stir often. Test always. Your even coat stays consistent shot after shot.
After-Dip Steps and Drying to Lock in Beauty
You just pulled your piece from the glaze bucket. Now act fast. These next moves lock in that even coat. Wipe the foot rim right away with a damp sponge. This keeps glaze off the base so it does not stick to kiln shelves. Then place it on stilts or props. They hold it upright and let air flow all around. Dry at room temperature for 24 to 48 hours. Rushing leads to cracks or sags later. Handle gently because wet glaze scratches easy.
Check every angle as it dries. Spot drips early, and fix them before they set. This step saves your work from firing flaws.
{“sectionTitle”: “After-Dip Steps and Drying to Lock in Beauty”, “imageIntent”: “potter wiping foot rim of freshly dipped ceramic bowl with sponge then placing on stilts to dry upright on shelf”, “prompt”: “hand-drawn sketch style with graphite linework light shading clean white paper background potter wiping sponge on foot rim of bisque bowl just dipped in glaze then setting on stilts props for upright drying simple shelf nearby focused sequence consistent line weight no color fills”}
Proper drying builds strength. Your glaze hardens smooth without pulls or bubbles.
Spotting and Fixing Drips Before They Bake In
Drips happen even with good dips. They show as thick runs down the side. Tilt the piece under light. Fresh glaze gleams wet. Act within minutes.
Grab a sponge first. Dampen it, then wipe upward from the drip bottom. Feather the edges so no lines show. For bigger runs, use a scraping tool like a rubber rib. Scrape gently at an angle. Blend into the coat around it.
Know when to stop. Tiny beads under 1/8 inch often smooth in firing. Leave them; wiping too much thins the glaze there. Test on scraps to learn your glaze’s behavior.
Here’s a quick fix guide:
- Sponge wipe: Best for fresh, soft drips. Press light, move up.
- Rubber rib scrape: Handles set drips. Angle low, short strokes.
- Let it be: For beads that shrink on dry. Saves evenness.
After fixes, return to stilts. Dry slow. Preview your firing: ramp slow from bisque to glaze cone. This bisque preheat burns out flaws gentle.
In short, quick checks now mean flawless shine later. Patience pays off big.
Avoid These Pitfalls and Troubleshoot Glaze Fails
Even pros hit common glaze dipping mistakes. Runs form thick globs down sides. Bare spots leave clay exposed. Crawling pulls glaze away in sheets. Pinholes dot the surface like craters. Dirty ware traps grit. Wrong temps cause cracks. Over-dipping builds too much. Yet you can fix most issues fast. Spot problems early, and salvage your pieces. Prevention beats rework every time. In short, these steps build your skills and save clay.
Know the signs first. Hold your piece to light after dipping. Runs gleam wet and sag. Bare spots shine dry compared to wet glaze. Crawling shows as bare cracks. Pinholes bubble tiny. Causes link back to prep or technique often. For example, dust on bisque creates pinholes. Thick glaze runs easy. Now let’s fix that uneven coat you see.
What to Do If Your Glaze Coat Looks Uneven
Uneven glaze frustrates everyone at first. Thick areas pool. Thin spots fade pale after firing. Inspect right away, while wet. Tilt under bright light. Mark spots with a soft pencil if needed. Run your finger lightly over the surface. Feel ridges or dips.
Sand high spots next. Wait 10 minutes for partial set. Use 220-grit paper. Work in circles. Feather edges smooth. Wipe dust with a dry brush. This evens the layer without removing too much.
Re-dip works well after sanding. Dry fully first, about 24 hours. Stir glaze fresh. Dip for half the original time, like 2 seconds. This adds thin coverage only where needed. Test on a scrap to match color.
Prevention stops repeats. Clean bisque better next time. Use compressed air, no water. Stir glaze often because it settles. Time dips strict, 3 seconds max for most. Dry slow in still air.
When to scrap? If cracks run deep or half the piece crawls, start over. Salvage saves 80 percent of fails though. Pros track mistakes in a notebook. Note glaze brand, dip time, and fix. Your log turns errors into wins.
Check Pottery Making Info’s glaze defect guide for photos of each fail.
{“sectionTitle”: “Avoid These Pitfalls and Troubleshoot Glaze Fails”, “imageIntent”: “potter inspecting uneven glaze on bisque bowl showing runs bare spots with sandpaper sponge nearby on workbench”, “prompt”: “hand-drawn sketch style with graphite linework light shading clean white paper background potter holding bisque bowl with uneven glaze runs and bare spots inspecting closely sandpaper sponge brush on workbench simple focused composition consistent line weight no color fills”}
Fixes like these boost confidence quick. Your next dip shines even.
Conclusion
You now hold the keys to a flawless even coat. Clean prep grabs glaze right. Steady dips with timed pulls prevent runs. Quick fixes catch drips early. These steps turn frustration into shine, just like Sarah’s story.
Here’s your quick recap:
- Brush bisque dust free and sand smooth.
- Mix glaze to yogurt thickness; test on tiles.
- Dip straight 3-5 seconds, tap excess, wipe foot.
- Dry 24-48 hours on stilts.
- Inspect and feather drips fast.
Practice that first dip on a scrap today. You’ll nail it quick.
Share photos of your glazed pieces in the comments. Subscribe for tips like our kiln firing guide. Your handmade pottery brings pure joy every fire.