Imagine your clay figure slumping over right in the middle of a project. Clay slips off the stand, and hours of work hit the floor. That frustration ends today.
A wire armature acts like a skeleton. It holds up your sculpture so it stays strong and does not collapse. You gain support for bigger pieces, easier hollowing, and confidence for tricky poses.
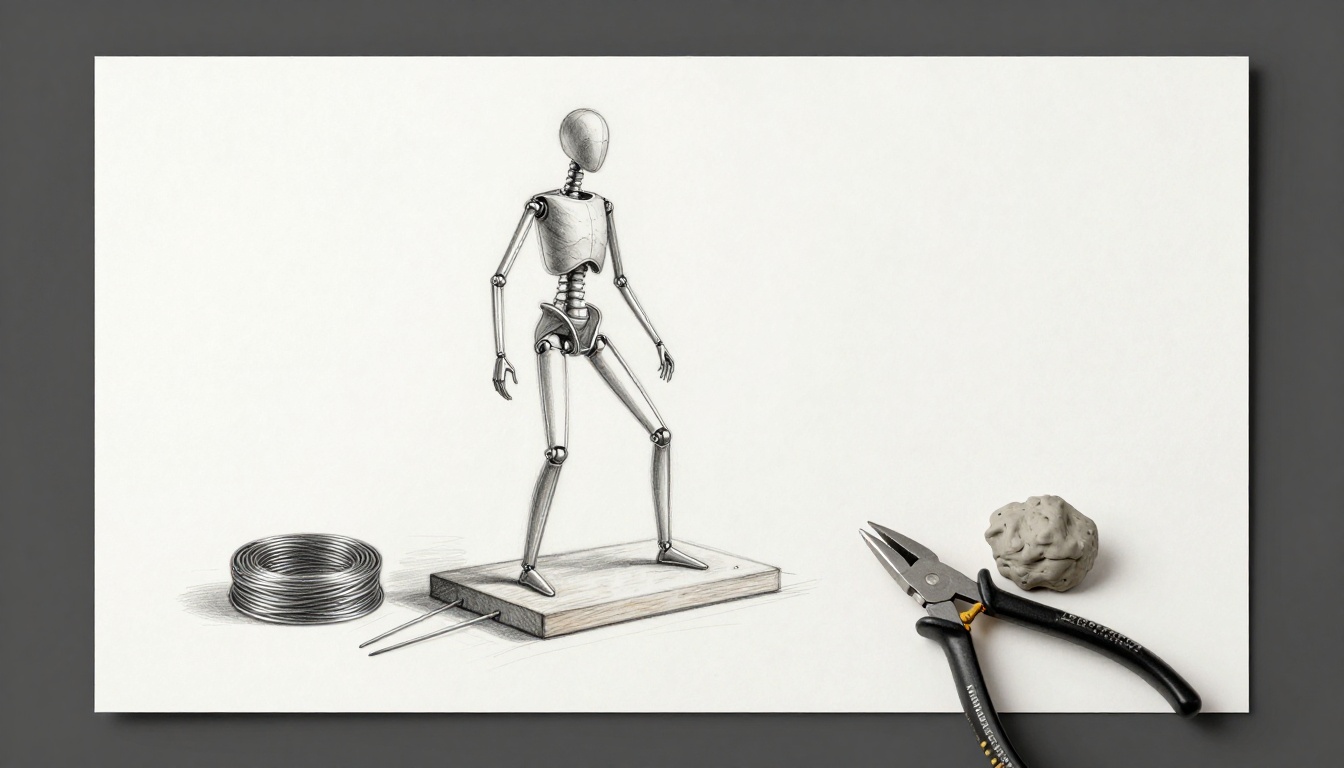
This guide walks beginners through every step. You will gather tools, sketch designs, build the frame, add clay, and skip mistakes. By the end, you have a sturdy base for your masterpiece.
Round Up the Right Materials and Tools
Start with the basics. You need 12 to 16 gauge annealed aluminum wire for the main frame. It bends easily but holds shape well. Then grab 18 to 22 gauge wire for arms, legs, and details.
Pick needle-nose pliers for tight bends. Heavy wire cutters make clean snips. Flat-nose pliers help grip without slipping.
For the base, use a wooden block or crumple thick aluminum foil into a ball. Masking tape or zip ties secure joints fast.
Optional items include a vise to hold your work steady or gloves for safety. Aluminum wire won’t rust, and it stays light. Buy from art stores or sites like Amazon. Total cost runs about 20 dollars for starters.
generateImage(sectionTitle=”Round Up the Right Materials and Tools”, imageIntent=”Display a collection of wire armature tools and materials laid out on a workbench, including coils of different gauge aluminum wire, pliers, cutters, wooden base, tape, ready for use.”)

These choices keep things simple. You avoid heavy metals that sag under clay weight. Test your pliers on scrap wire first. They must cut without fraying ends.
In addition, annealed wire softens during making. It straightens less over time. So, your sculpture holds poses better.
Sketch Your Design for a Stable Sculpture
Skip sketching, and you risk wobbly results. Draw simple views first: front, side, back. Mark key points like head, shoulders, hips, knees.
Focus on balance. A wider stance adds stability. Keep the spine vertical for human figures. For a standing person, hips sit over feet. A sitting animal needs flat base supports.
Add extras like a tail or prop if needed. Start small with a maquette to test ideas. Measure wire lengths from your sketch. This saves time later.
For example, a cat pose curls the back. Sketch shows spine arc and leg bends. Scale it up after.
Artists often use this step for big works. It prevents redesigns mid-build.

Check proportions twice. Uneven limbs cause tilts. Use pencil for easy changes.
Build Your Armature Step by Step
Work from the base up. This builds strength layer by layer. Twist wires tight at joints. No gaps allowed. Shake after each addition to test.
Use thick wire first. Save thin for last.
Start with a Rock-Solid Base
Shape foil into a fist-sized mound. Or cut wood to 4×4 inches. Poke holes for leg wires. Anchor them deep.
Secure the spine wire next. Twist feet around base wires. Or screw in for extra hold. This stops tipping when clay adds weight.
A strong base handles tall figures. Test by pushing side to side.
Form the Spine and Torso Core
Cut 2 to 3 feet of thick wire for the spine. Bend it to match your sketch curve. Leave extra at the bottom.
Loop thinner wire around the spine 4 to 6 times. This makes a ribcage. Twist every inch tight.
The torso now supports arms. Keep loops even for smooth clay layers.

Shape and Attach the Limbs
Cut arm and leg wires to sketch lengths. Bend at shoulders, elbows, hips, knees. Use smooth curves.
Twist ends firm to torso or spine. Mirror left and right sides. Even weight matters.
Add small loops at hands and feet. They grip clay better.
For details on wire bending techniques, check this wire sculpture tutorial from Blick Art Materials.
Add Fine Details and Reinforce
Grab thinnest wire for fingers, toes, ears, tail. Twist light to main limbs.
Shake the whole frame. Add diagonal braces if it wobbles. Trim excess ends clean.
Balance improves with these touches. Your armature mimics real bone structure.
Test and Tweak for Perfection
Pose it fully. Press to mimic clay weight. Fix weak spots with twists or braces.
Let it sit overnight. Bends settle in place. Now add clay without fear.
Layer on Clay and Avoid Cracks
Score wires with a tool first. Clay sticks better. Build thin layers from core out.
Mix slip at joints. It acts like glue. Cover all wire, but leave base open for mounting.
Hollow big pieces through the bottom. This stops kiln explosions. Dry slow under plastic.
Work one section at a time. Keep others moist. Layers bond strong.

For hollowing tips, see this guide on clay sculpture techniques from Sculptor.org.
Smooth as you go. Cracks form from thick builds.
Dodge These Common Beginner Mistakes
Newbies pick stiff wire. It snaps easy. Stick to annealed types.
Skimp on base for tall pieces. They tip over. Make it twice as wide.
Uneven limbs cause tilts. Measure twice before twisting.
Few twists let joints slip. Double up on key spots.
Overload one side. Balance clay adds too. Redistribute weight.
Overbuild support always. Remove extra later if needed.
These fixes save projects. Check as you build.
Ready for Firings and Finishes
Your armature delivers wins. No more flops mean bolder sculptures.
Start simple, like a standing figure. Build skills fast.
Fire low if using it in kiln. Or remove before high heat. Paint or glaze next for shine.
Try this weekend. Share photos in comments. Tag us for features.
Anyone masters this with practice. Your clay dreams stand tall now.
(Word count: 1487)