You pinch a fresh lump of wet clay on your wheel or table. It shapes up nice at first. Then you spot those ugly fingerprints and jagged edges everywhere.
Those marks frustrate any potter because they make your piece look sloppy. Rough spots happen fast with wet clay, but you can fix them quick. This guide shows simple tools and steps to smooth out fingerprints and rough edges on wet clay right at home. No fancy gear needed. You’ll get pro results fast, so your clay stays workable and clean.
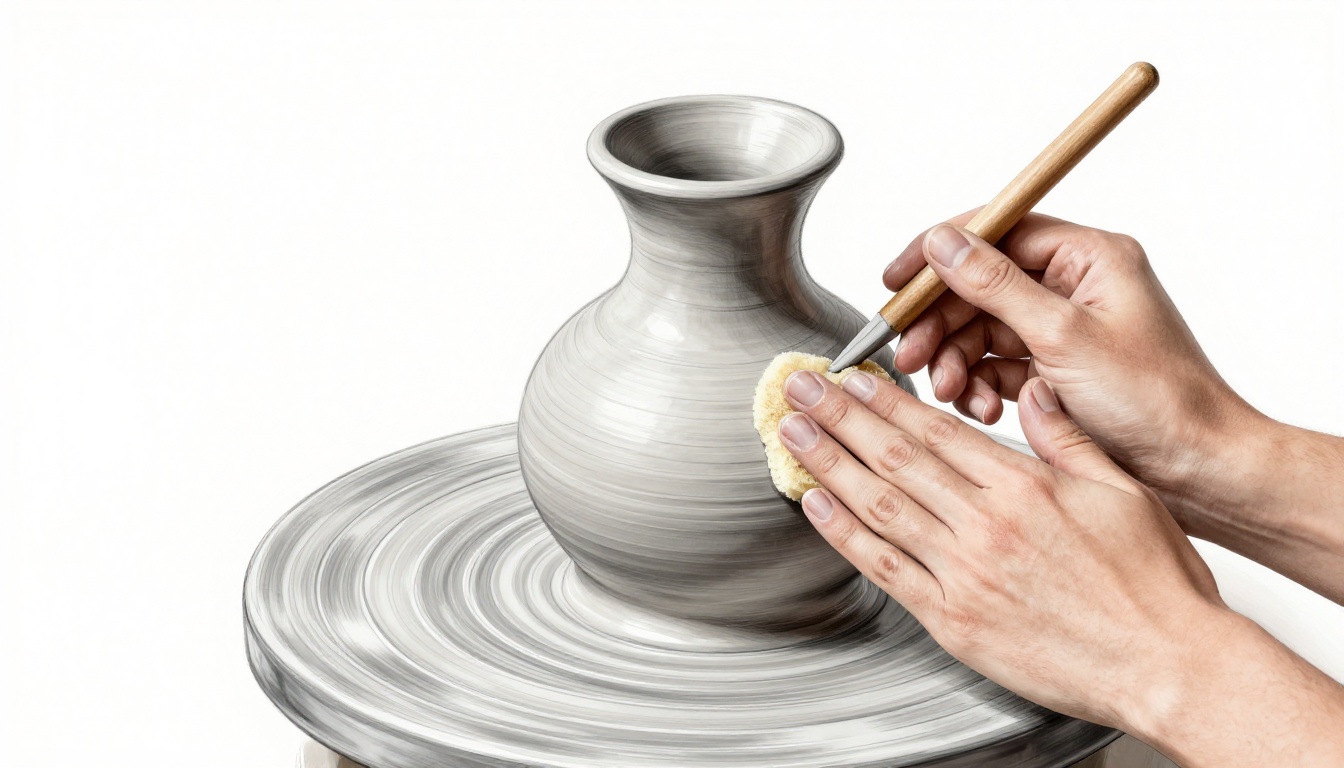
Spot Fingerprints and Rough Spots Before They Ruin Your Clay Piece
Fingerprints show up on wet clay from your own touch. You press too hard or handle it often during building. Rough edges form when you pinch slabs together or pull uneven walls.
Catch these issues early. That way, fixes stay simple and you avoid big rework. Always keep your clay moist with a spray bottle nearby. Pause after each stage to inspect.
Turn your piece slowly under bright light. Marks pop out fast that way. Benefits include smoother final pieces and less waste.
Main Causes of Marks on Wet Clay
Heavy finger pressure leaves deep prints. Beginners often squeeze too much to shape fast. Lighten your touch instead; it prevents most dents.
Quick movements create drags or tears. Clay grabs your skin if you rush joins. Slow down for clean lines.
Low humidity dries edges first. They crack or roughen in dry air. Mist the air around your workspace.
Poor centering on the wheel causes wobbles. That leads to uneven pressure and spots. Center well before pulling up.
For more on common beginner pottery mistakes, check solid tips from experts.
Simple Checks to Catch Problems Fast
Use side lighting from a lamp. Shadows highlight fingerprints clearly. It takes seconds but saves hours.
Run a wet finger lightly over the surface. Feel for bumps or dips without pressing. Smooth areas glide easy.
Snap a photo with your phone camera. Zoom in to spot tiny rough edges. This trick catches what eyes miss.
These checks lead right into smoothing. You fix small now instead of scraping later.
Grab These Everyday Tools to Smooth Clay Like a Pro
You don’t need a full pottery studio. Everyday items smooth wet clay perfect. Start with a basic kit: soft sponge, rubber rib, paintbrush, and chamois leather.
These tools work because they hug wet clay without tearing. Buy them cheap at craft stores or online. Results come quick for flawless surfaces.

Caption: Your basic kit for pro-level smoothing.
Sea sponges cost little and last years. They wipe broad areas gentle.
Rubber ribs shave precise spots. Chamois adds shine at the end.
Sponges and Brushes for Gentle Wiping
Natural sea sponges have texture for blending. They lift fingerprints without soaking the clay. Prep by damping; never drip.
Household synthetic sponges work for quick wipes too. They’re soft and always handy in the kitchen.
Soft paintbrushes reach details. Use them for edges or textures. Rinse between passes to stay clean.
These stay cheap and ready. Pros include no mess and fast use.
Rubber Ribs and Scrapers for Precision
Rubber ribs come kidney-shaped or flat. Flexible ones follow curves easy. Hold at a low angle for light shaves.
They remove rough edges without gouges. Clean often under water. If no rib, a plastic card does in a pinch.
Keep tools sanitary to avoid clay buildup. See rubber ribs at art supply sites for options.
Chamois Leather for That Final Polish
Damp chamois buffs to a sheen. It pulls excess water and evens tiny bumps. Find it at auto stores for cheap.
Better than cloth because no lint sticks. Wring well before use. Perfect last touch.
Follow These Steps to Erase Fingerprints and Even Out Rough Edges
Work while clay stays wet and soft. Start broad, then refine. Patience gives the best finish.
This process removes fingerprints from wet clay and evens everything. Your pieces look ready for drying or firing.
Numbered steps make it foolproof for newbies. Prevent tears by going slow.
Start with the Damp Sponge Wipe
Wet your sponge lightly. Pat off excess water on a towel.
Circle gently over fingerprints. Blend them into the surface smooth. Use first on big areas.
It fills shallow marks fast. Rinse sponge as needed.
Scrape Smooth with a Rubber Rib
Hold the rib at a 10-degree angle. Apply light pressure and follow the form’s curves.
Rinse the tool often. It shaves deeper rough edges clean.
Feels like spreading icing smooth. Great for walls or rims.

Apply Slip for Seamless Fills
Mix slip with clay scraps and water. It matches your piece’s color.
Brush it into cracks or rough joins. Smooth over with sponge.
Dries even, so no seams show. Ideal for attachments like handles.
Learn how to make pottery slip for best mix.
Buff to Perfection with Chamois
Wring a damp chamois tight. Rub lightly in circles.
It removes micro-bumps for silk feel. Let clay air dry after.
Final shine makes pieces pop.
Extra Tricks and Fixes to Keep Your Clay Flawless
Work in small sections. Cover unused clay with plastic to stay moist.
Boost humidity with a bowl of water nearby. Fixes over-wetting by patting dry gentle.
Stop when the surface feels silky under your finger. Practice on scrap clay first.
What tool will you try next on your wheel?
Timing Tips for Peak Smoothness
Smooth during the wet stage only. Clay firms too much later for easy fixes.
Ready signs: clay moves under light touch. Too late if it resists.
Dodging Beginner Blunders
Press too hard and tear clay. Use feather-light strokes instead.
Dry tools drag marks. Dampen everything first.
Ignore moisture and get cracks. Spray often.
Rush the steps. Take time for layers to blend.
Over-wet turns sloppy. Blot excess quick.
Smooth Clay Starts with Smart Habits
You now know tools, steps, and tricks to smooth wet clay perfect. Fingerprints vanish and edges even out fast.
Grab a sponge or rib today. Try these on your next piece. Share your smooth results in the comments.
Your pottery will shine clean every time. Keep building with confidence.