You finally shaped that perfect vase from two slabs. It looks great on the shelf. Then, right before firing, a crack splits the seam.
Clay artists face this heartbreak often. Seams fail because they dry at different rates or lack a strong bond. The slip-and-score method fixes that. It roughens surfaces for grip and uses liquid clay as glue. This creates joins that mimic how clay fuses naturally. It works for slabs, coils, or sculptures and holds up in the kiln.
You’ll get a supplies list first. Then detailed steps follow. Next come pitfalls to avoid and pro tips. By the end, you join pieces flawlessly.
Stock Up on These Simple Supplies for Seamless Joins
Gather basics before you start. Each item plays a key role in strong bonds. You don’t need fancy gear. Kitchen tools work fine for beginners.
Leather-hard clay pieces form the base. They feel firm but not bone-dry. Work with matching clay bodies. This prevents shrinkage mismatches later.
Pick a scoring tool next. A serrated rib, needle tool, or even a fork scratches surfaces. The teeth create rough texture for lock-in.
Slip acts as your glue. Make it from scraps of the same clay or buy premade. Mix crumbled dry clay with water to yogurt thickness. Strain out lumps for smooth application.
Grab a small brush or use your finger to spread slip. A damp sponge wipes excess. Keep a shallow bowl of water or slip handy. An optional rib smooths seams.
Budget tip: Raid your kitchen drawer. A plastic fork scores well. Old yogurt containers hold slip.
Prep your workspace too. Clean table, damp cloths nearby. This keeps clay workable. No dry edges mid-project.
Here’s a quick supplies checklist:
- Leather-hard clay pieces
- Scoring tool (rib, needle, or fork)
- Slip (homemade or premade)
- Small brush or finger
- Damp sponge
- Shallow bowl for slip or water
- Optional smoothing rib
For a full recipe on making slip at home, check this guide. It matches most clay types.
With supplies ready, you build confidence. No last-minute hunts disrupt flow.
Follow This Proven Slip-and-Score Process for Strong Bonds
Work in a comfy spot. Check clay first. Both pieces should feel leather-hard. Too wet warps; too dry crumbles. Patience pays off here.
Follow these steps in order. Even moisture ensures success. Take your time at each stage.
Rough Up the Edges by Scoring Both Surfaces
Score both join areas first. Make shallow crosshatch scratches. Aim for 1/8 inch deep, like a tic-tac-toe grid.
Hold the tool at a 45-degree angle. Drag it across the surface. This removes any glaze and exposes fresh clay. The pattern creates tooth for grip.
Score a wider band than the seam line. Dust flies off. Brush it away lightly. Both pieces must match in moisture now. Test by feel.
Deep scores lock mechanically. They prevent slips during pressure.
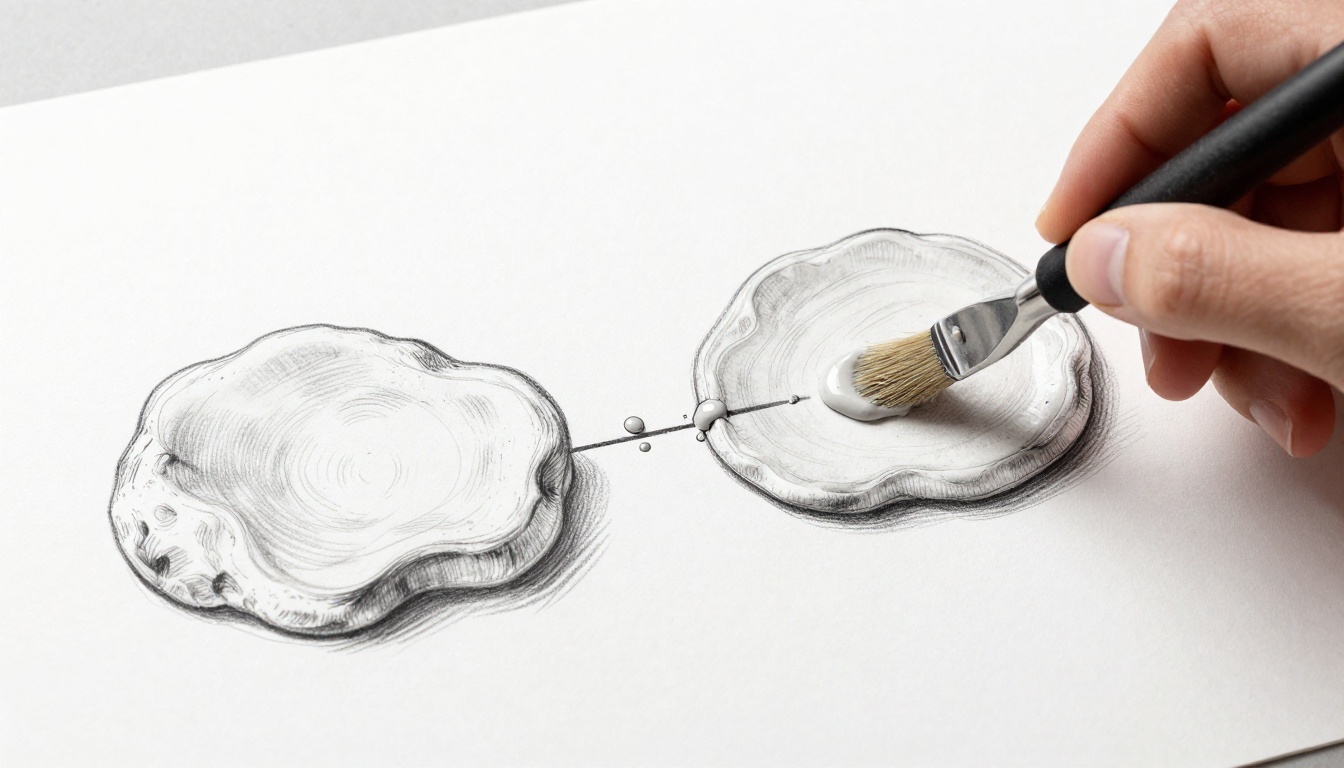
Mix and Slather on the Slip Glue
Slip binds everything. It’s liquid clay with water. Apply a thick layer over scored spots on both pieces.
Use a brush or finger. Spread generously. If homemade, blend until smooth. No lumps clog the bond.
Let it sit 30 seconds if runny. It thickens fast. In humid spots, add a vinegar drop for stickiness.
Cover fully. Full contact means strong fusion.
For more on slip chemistry basics, this page explains why it works.
Align Pieces and Press with Steady Pressure
Position precisely before pressing. Slide together gently. Then squeeze from center outward.
Use palms for even force. Or tap a mallet through cloth. Wiggle slightly. Scores interlock now.
Hold 1-2 minutes. Check inside hollow spots by tapping. No gaps echo.
Firm pressure welds the clay. It expels air pockets too.
Blend the Seam Smooth to Hide Your Work
Dip finger or tool in slip-water mix. Drag along the seam. Feather edges into the clay body.
Wipe excess with sponge. Compress lightly again. Cover with plastic. Let it dry slowly.
This hides your join. It also prevents weak cracks in firing.
Smooth seams look pro. They dry evenly as a result.
Sidestep These Slip-and-Score Blunders for Flawless Results
Beginners hit snags often. Seams pull apart or crack. Know these fixes upfront. You avoid exploding pots in the kiln.
Common errors stem from scoring, slip, pressure, or drying. Spot signs early. Prevent heartbreak.
Weak Scores That Let Seams Pull Apart
Shallow scratches fail first. No pattern means no mechanical lock.
You see clay color unchanged. Seams tug free easily.
Fix it: Crosshatch deep. Scratch with fingernail to test strength. Color shifts prove depth.
Always score both sides equally.
Runny Slip That Squeezes Out on Pressure
Watery slip lacks glue power. It squirts out under squeeze.
Bonds weaken fast. Firing stresses show cracks.
Thicken to cream consistency. Match your clay body. Store airtight for reuse.
Let it rest if needed. This forum thread shares real fixes from potters.
Rushing Dry That Cracks Your New Join
Fast air drying stresses seams. Edges pull apart overnight.
Kiln heat worsens it.
Wrap in plastic 24-48 hours. Dry slow in room temp. Mist if edges curl.
Slow dry builds strength.
Level Up Your Joins with These Expert Tweaks
Master basics? Add these hacks. They handle thick builds or delicate work.
Layer slip twice on bulky joins. First coat soaks in. Second seals tight.
Use paper clay slip for thin sculptures. It grabs fragile edges better.
Vibrate the piece gently after pressing. Air bubbles escape. Tap on a soft surface.
Test fire a small sample first. Check strength before big pieces.
For coil pots, score coils extra deep. Slab handles need full wrap-around slip.
Scale to sculptures now. Strong joins mean creative freedom.
See advanced joining techniques for big projects.
These tweaks turn good pots into heirlooms.
Slip-and-score delivers sturdy joins that survive firing. You score rough, slip thick, press firm, and smooth even. Simple steps yield pro results.
Grab your clay today. Try it on scraps first. Share photos in comments. What cracked for you before?
Next, check clay firing schedules. Turn those lumps into lasting art.
(Word count: 1487)